
Denim and DIYs
- Jan 13, 2018
- 3 min read


Hello, ladies! We are back with a DIY which hopefully helps you save a few extra bucks in your new year.
Keeping up with the latest trends and styles can be hard especially on your bank account, so why not become a little crafty (if you are not already😊) and save big time!
Go get your fabric scissors, your old jeans, your creative cap, and we will cut to the chase!
{{The Fringe}}
Step 1.

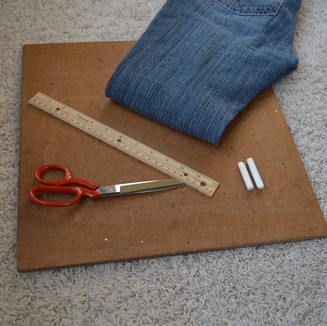
The very first thing you will want to do is pull out all of your supplies such as:
A Cutting board or some sort of stiff material to cut on (you get the idea!)
Some old jeans or jeans that you do not mind being guinea pigs…
A ruler
Fabric scissors
Chalk
Step 2.
Then you can do this…...it pretty much explains itself…hopefully :P

Step 3.


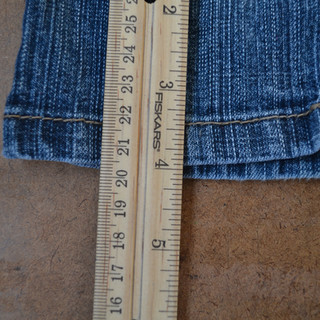
Measure 4 inches from the bottom of the pant leg (use this as a guide, but you will probably want to try your jeans on to see how cropped you want them). After making your measurement, draw a horizontal line with your chalk across the pant leg. Next, take your fabric scissors and cut along the chalk line.
Step 4.

Now that you have cut off the excessive amount of unneeded length from your jeans, take your ruler again and measure, from the bottom of the pant leg, 2 inches. Once again whip out that chalk and make your “no cutting above this line”……..line.
Step 5.


Alrighty, now we are going places! Holding the front and back of the base of the jeans, take your scissors and cut small vertical strips up to the chalk
line.
Step 6.

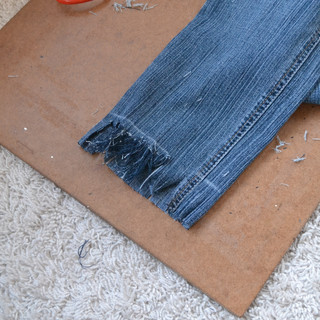
The time has come for the most tedious part of the process, so make sure you have some time set aside for this step. (Side note: If you do not want to have to put the time into it, you can just throw them in the dryer for 20-30 minutes. It will not give the fringe the same effect, but it still gives them the distressed look.) Take one strip and pull (either using your hands or tweezers) the little, blue vertical threads to the base of the white chalk line. As you are pulling these strips apart, like peeling a banana, also pull out the horizontal white threads. Once you have pulled down all the blue threads and pulled out all of the white threads…..YOU ARE DONE!!!
The final look:


Next up...
{{The Uneven Hem}}
Step 1.


Gather supplies:
1. Your handy cutting board
2. Jeans
3. Ruler
4. Fabric scissors
5. Chalk
6. Whatever you can find to help distress your jeans such as tweezers, a needle, and a nail file:)
Step 2.

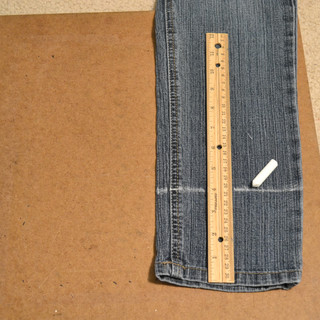


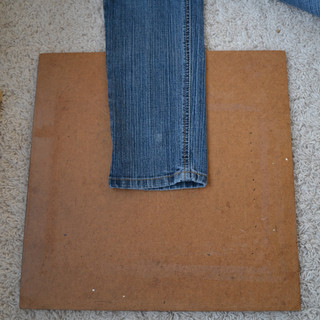
(Picture 1) Try on your jeans to decide how cropped you would like them, but as a guide, you will probably want to cut off 4-6 inches depending on your height. Measure. Make your chalk line. Cut.
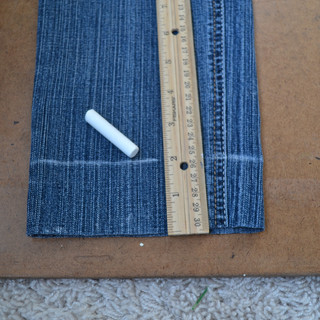
(Picture 2) Grab your ruler again and...... *drum roll*.....measure another 2 inches and make your line. YAY!!! But. Do. Not. Cut.... Instead, draw a chalk line along both side seams.
Step 3.


Alright, now you are allowed to cut along the lines that you have artistically drawn! And it should look exactly like the above picture if not PANIC!!! Just kidding! I am sure you are doing absolutely perfect....moving on!
Step 4. (AKA the fun part!)


The time has arrived to distress that hem! File those jeans along the hems to give them the distressed/worn look and pluck those threads! And you are finished!
Last but not least...
{{How to rip your own jeans}}
Step 1.
When it comes to ripping your jeans it will differ based on where you are wanting the rip or hole. If you are wanting it to land on your knee definitely try them on and wear them around for a little bit.
Step 2.
Take your chalk and mark where you want the slit to be. If in doubt it is better to make your chalk line higher so the rips will always fall slightly above or mid knee.
Step 4.
Take them off and cut with your fabric scissors along the line.
Step 5.
Then take your tools from the Uneven Hem DIY above to distress and pull out loose threads to complete the look.
And there you have some DIY rips!


*Optional Step 6.
Using the same steps above, create rips along the legs of your jeans at your desired location.
Comments